3. Setting up your menu
Build your menu once, then keep it current — items, categories, options, pricing, and per-branch rules.
Your menu is what customers order from. Build it once, then keep it current.
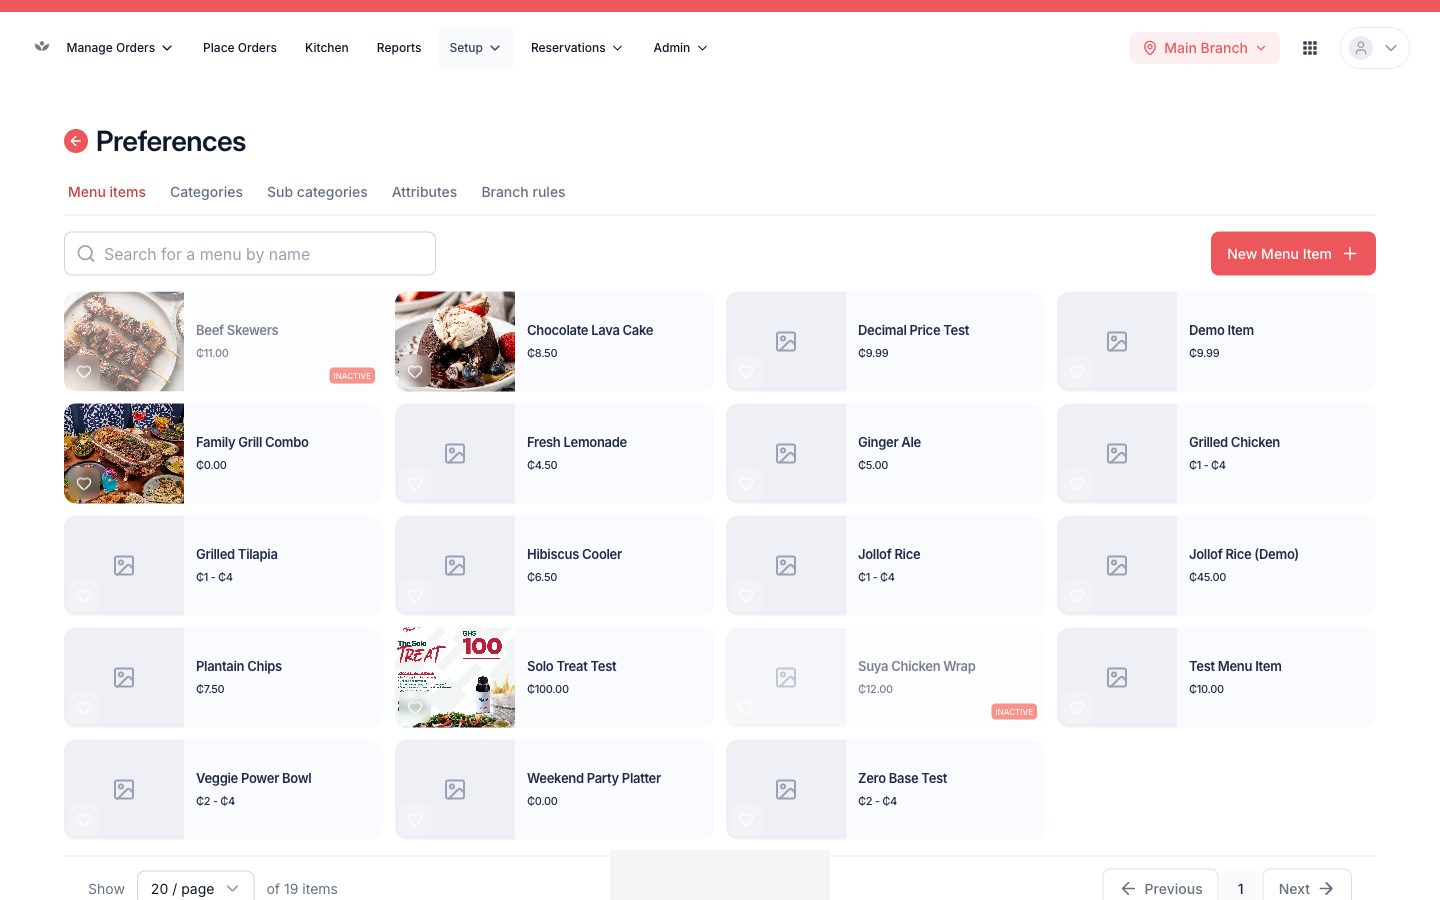
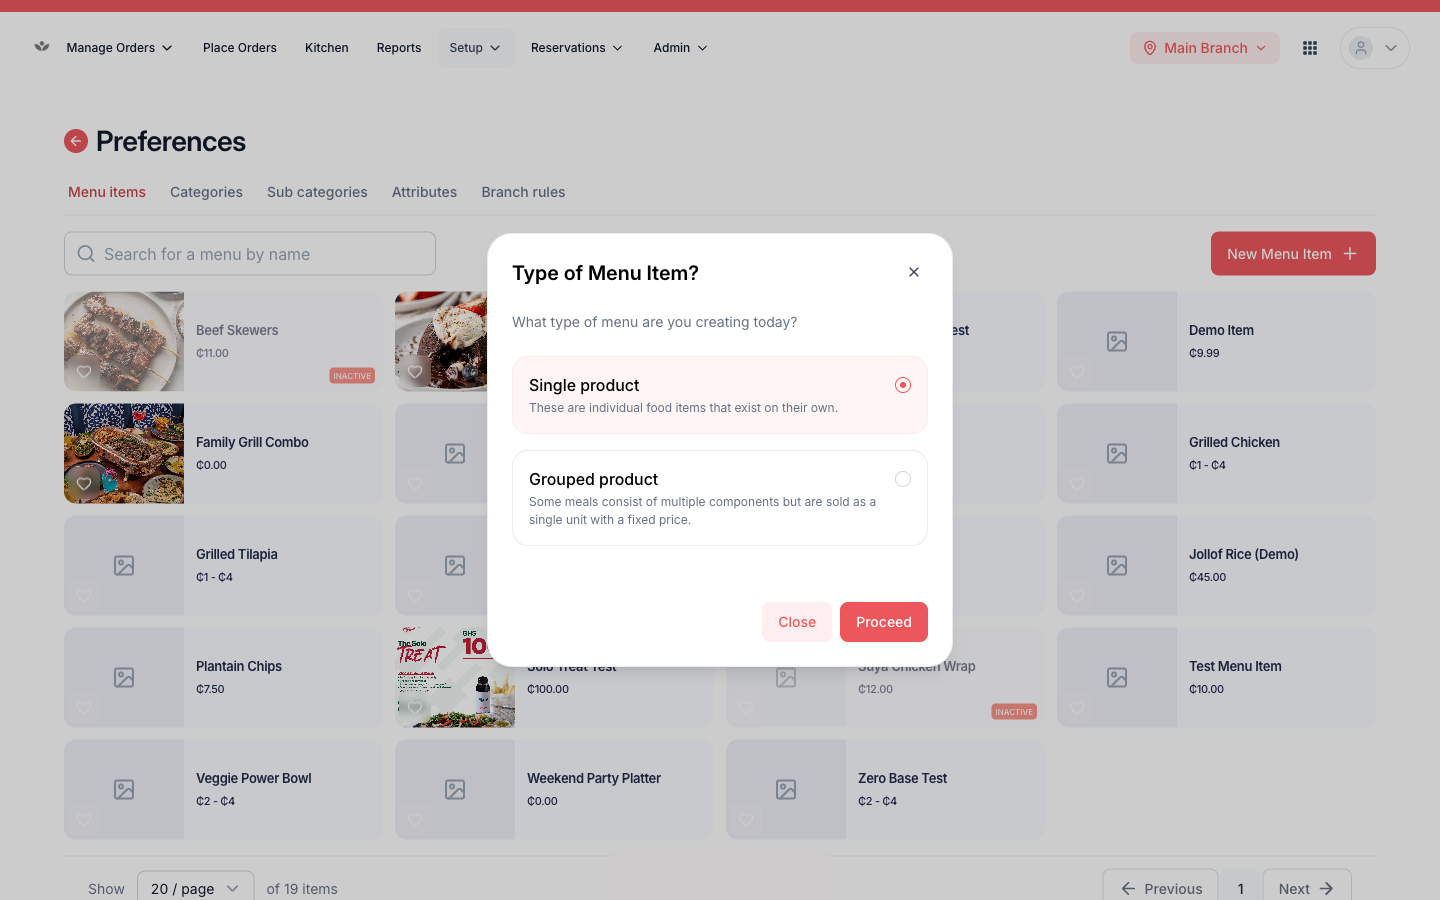
Add a menu item
- Go to Setup → Menu.
- Select Add item.
- Fill in the name, description, price, and category.
- Upload a photo.
- Set its status / availability (available or unavailable).
- Assign it to the branches that serve it.
- Save.
Tip
You can search and browse all items in the card grid. Use the search box to find an item fast instead of scrolling.
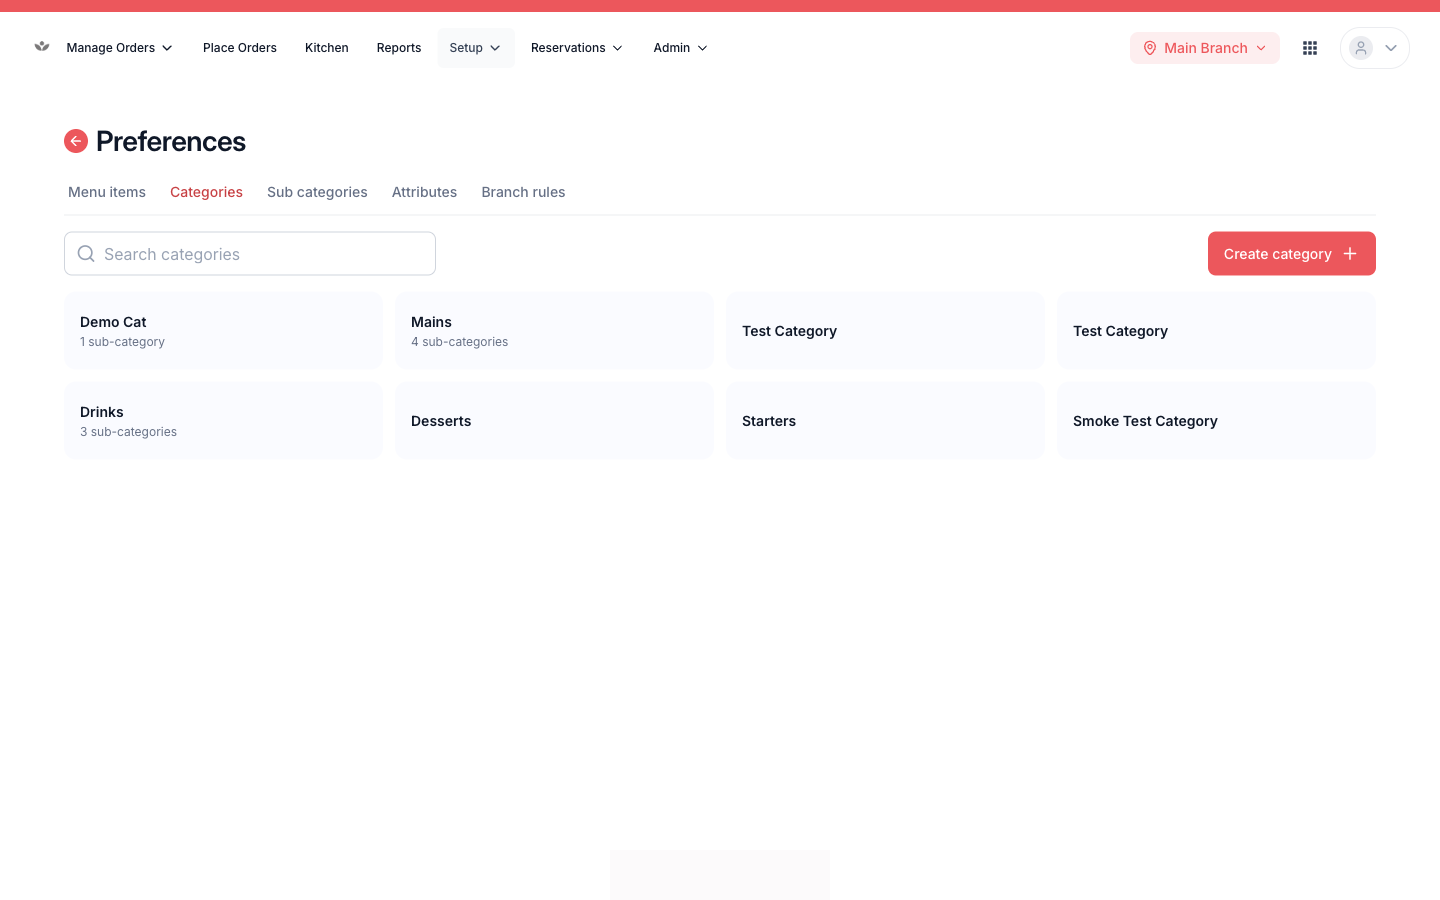
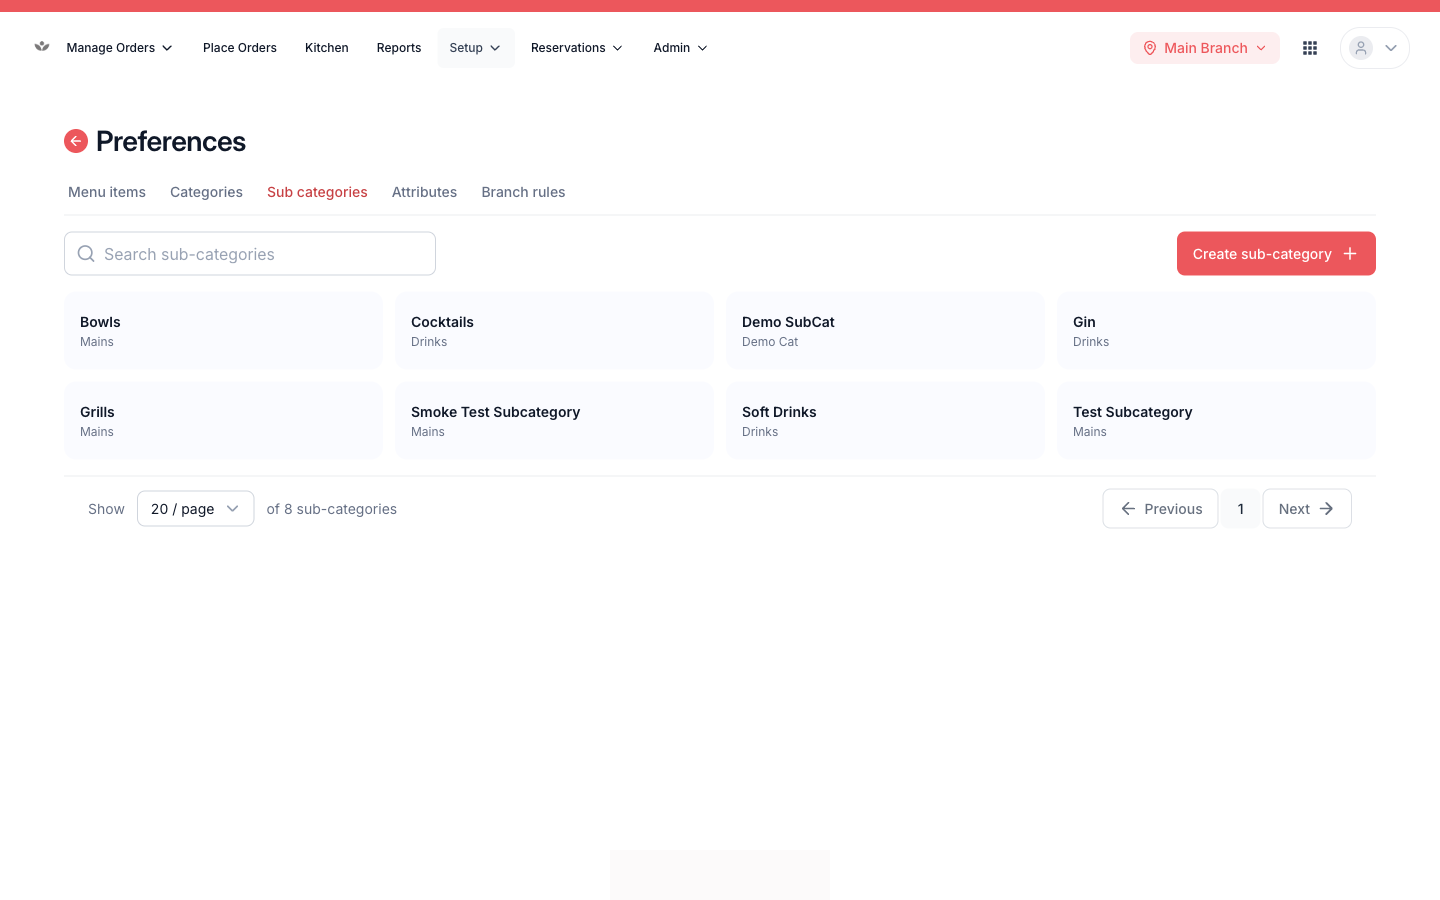
Organise with categories & subcategories
Group items so customers (and staff) can find them.
- Go to Menu → Categories.
- Add a category with a name and image.
- Add subcategories under it where you need finer grouping.
- Drag to set the order they appear in.
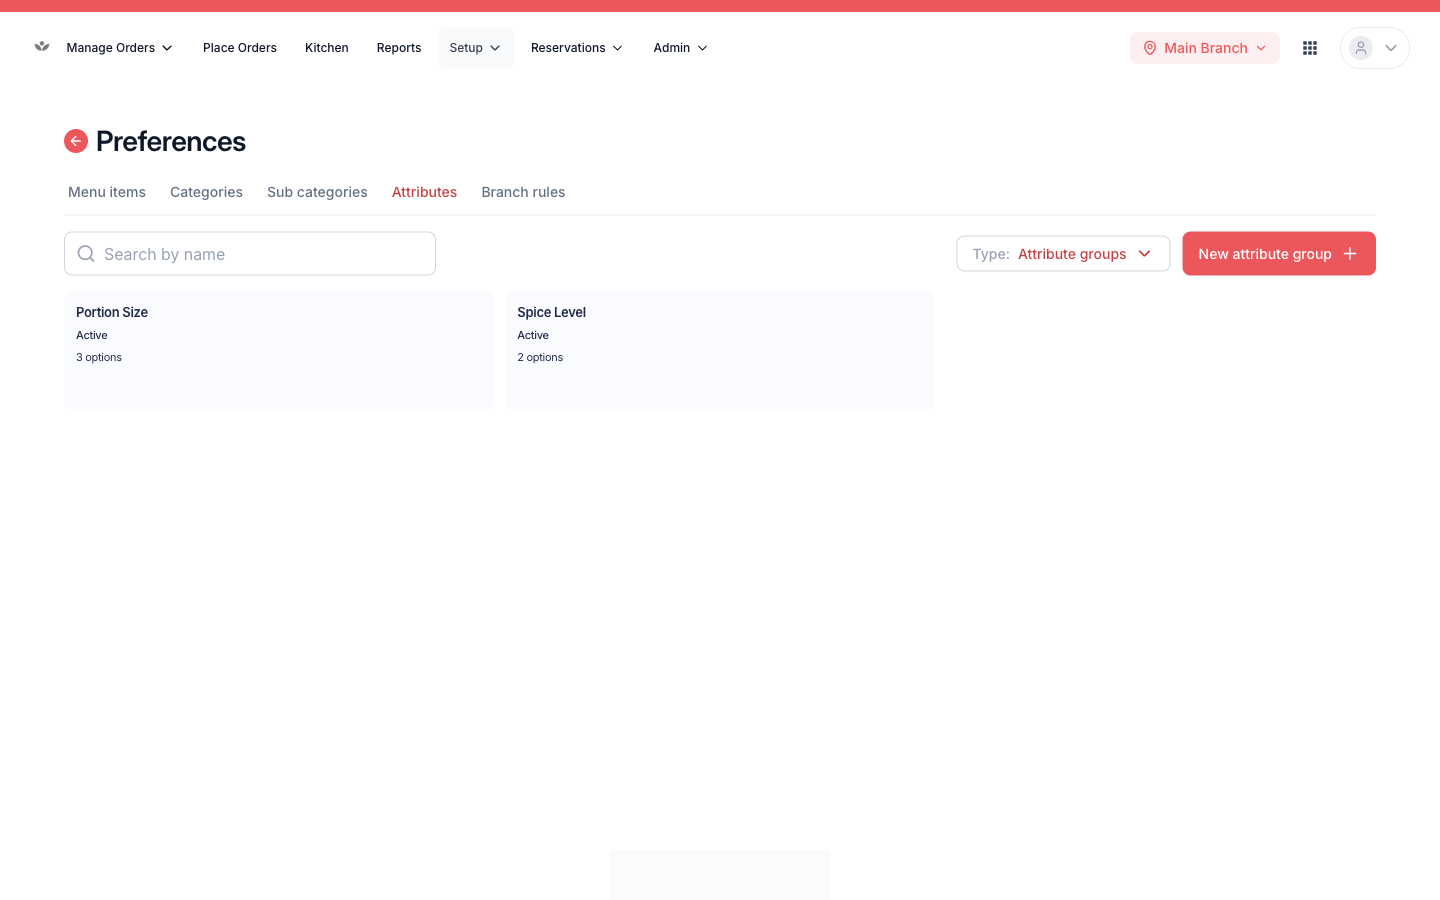
Options & add-ons (attributes)
Attributes are the choices a customer makes on an item — size, toppings, extras.
- Go to Menu → Attributes.
- Create an option group (e.g. “Size”) with its options (“Small”, “Large”).
- Attach the group to the items it applies to.
- Drag to reorder groups and options.
Pricing & charges
Set up how money is handled.
- Go to Menu → Payments / Pricing.
- Configure payment types, discounts (percentage or fixed), service charges, and your tax / pricing model.
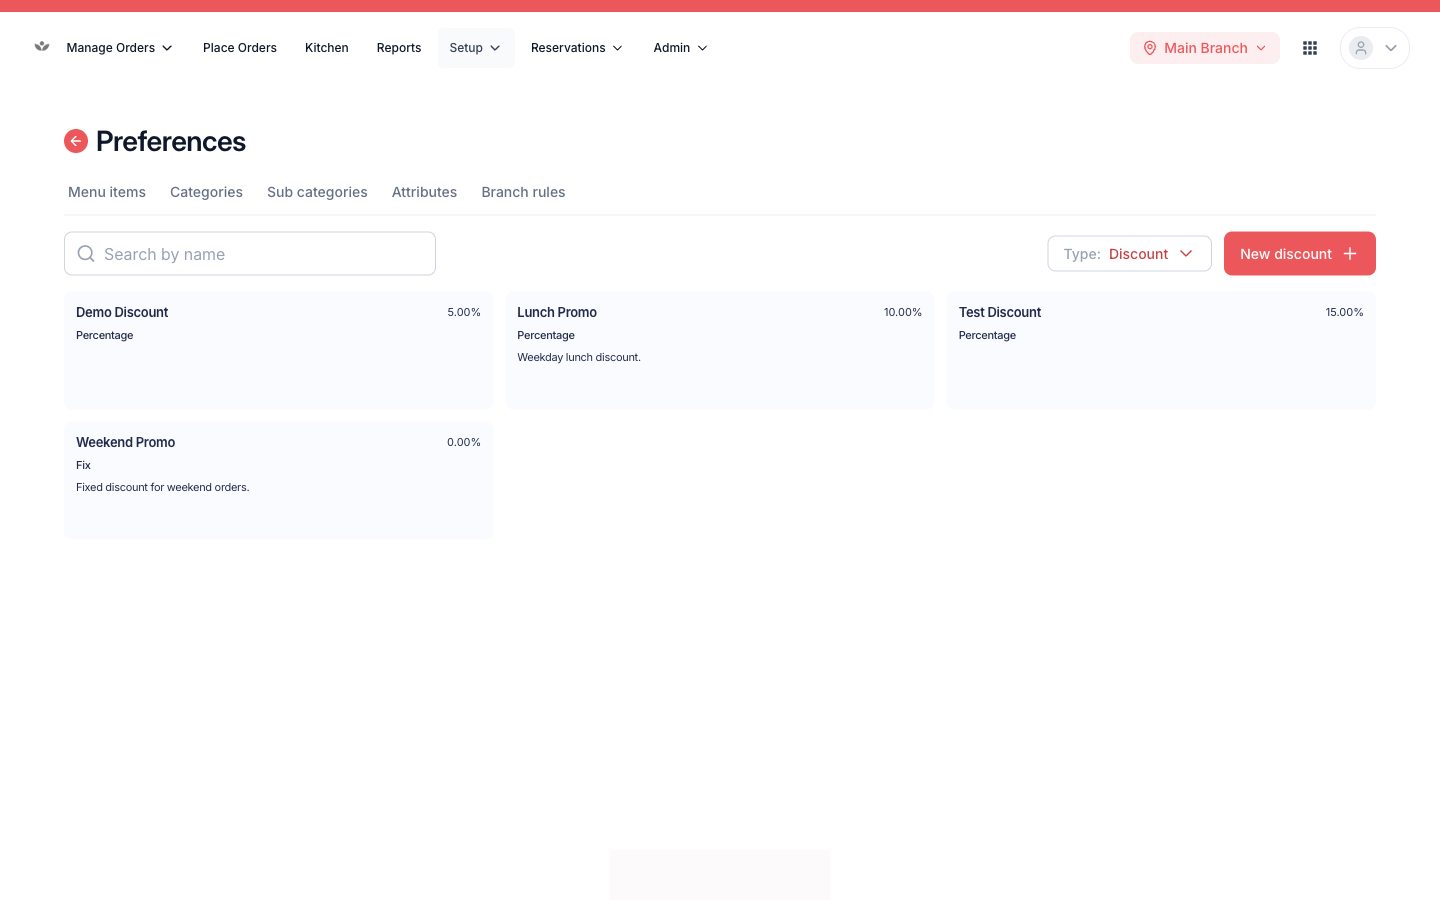
Note
Service charges are managed alongside discounts. A service charge is just a discount set to the “service charge” type.
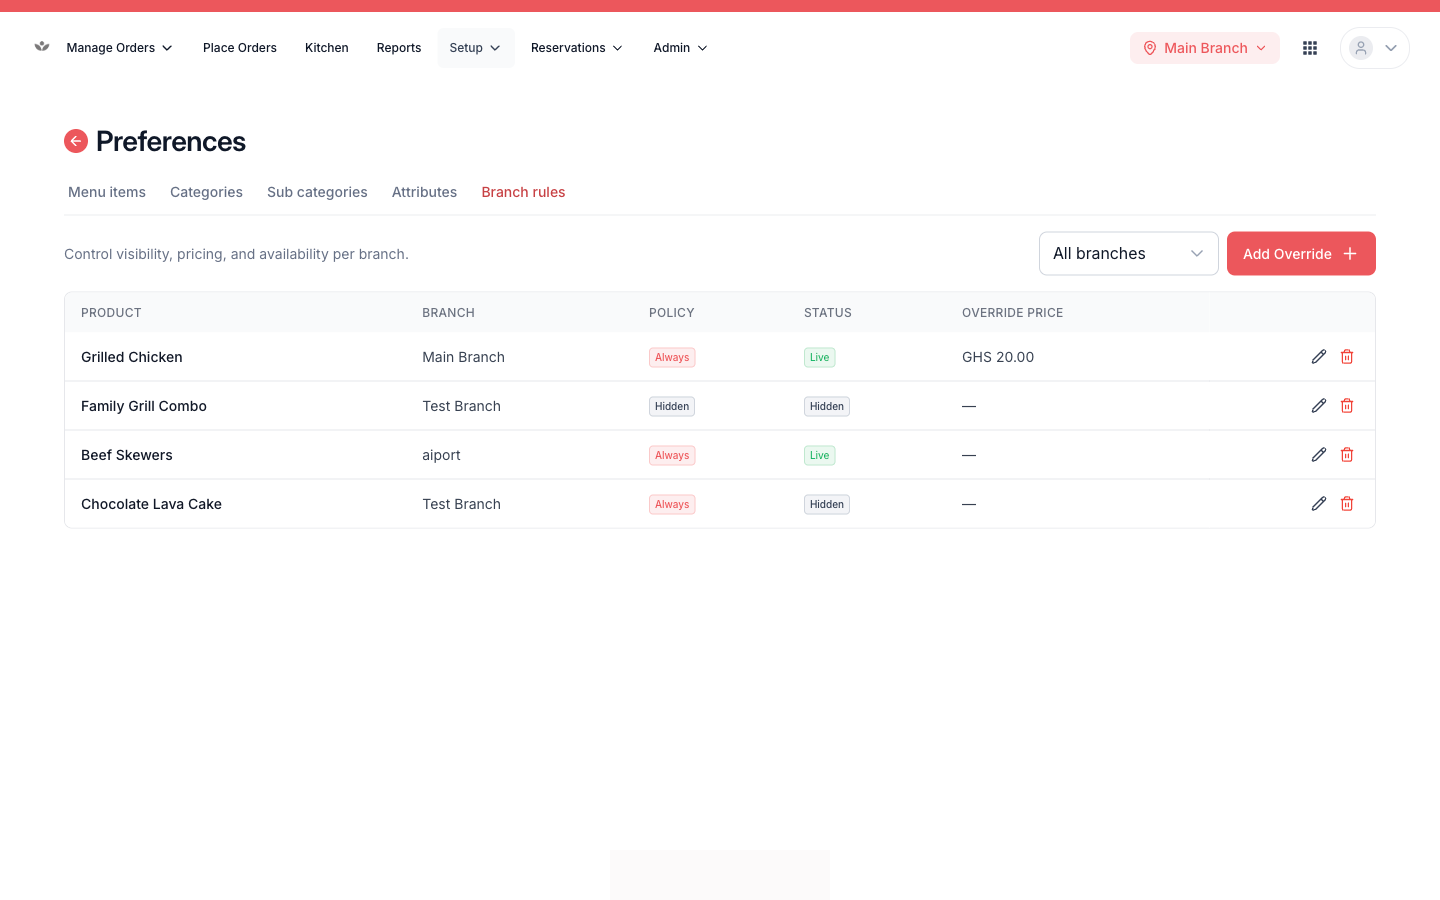
Per-branch menu rules
When you run more than one location, each branch can differ.
- Go to Menu → Branch pricing.
- For the selected branch, override an item's price, availability, or visibility.